Badges given for Module completion can be so much fun and motivating for a student. It is really easy to do once you set everything up.
Step: 1. Login to Canvas and make sure Badgr is turned on in Settings/Navigation, be sure to SAVE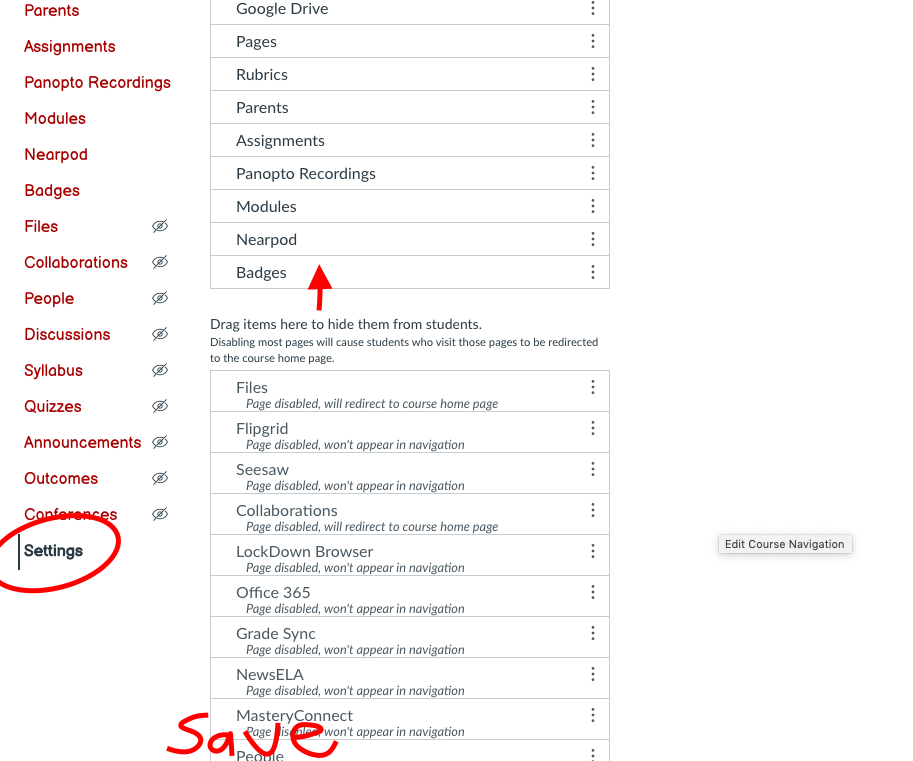
2. Click on Badges in the left menu. This will ask you to select or create an issuer. 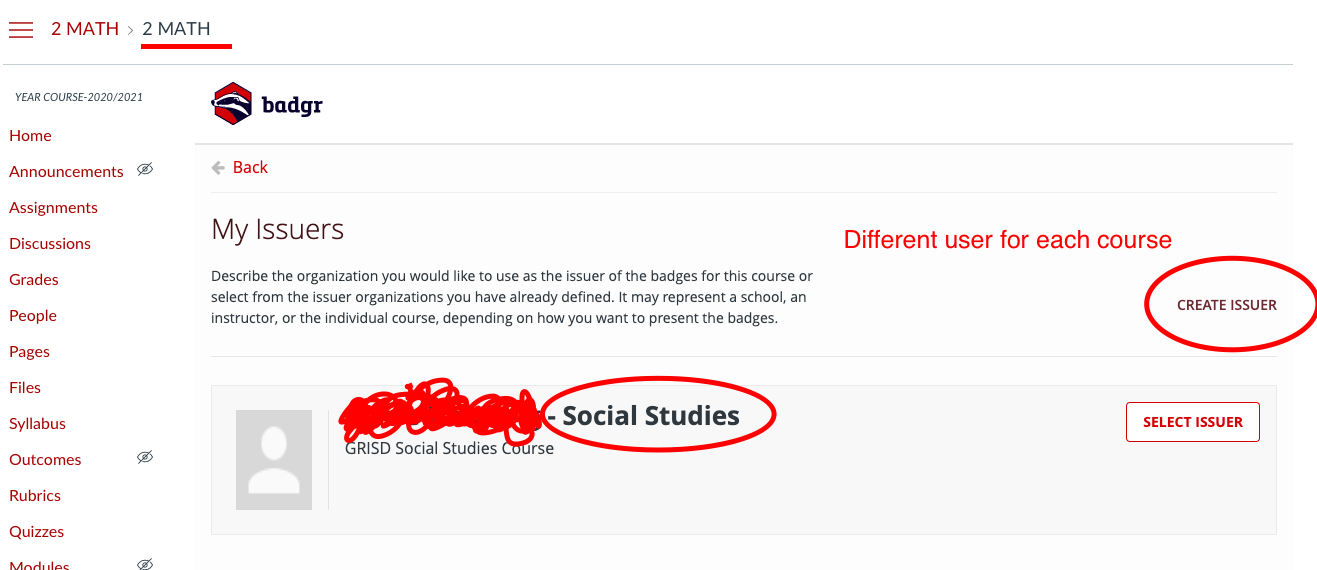
3. Create a separate issuer for each course in Canvas unless you plan on having all your badges for each course be the same. Select the issuer for each separate course by changing to that course in Canvas and click on Badges in the left menu. Then select the issuer for that course.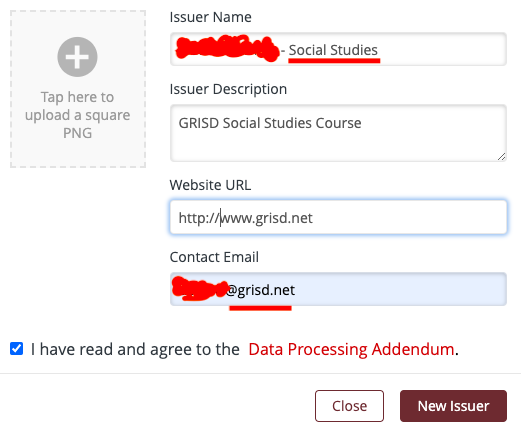
4. Go to Canva.com and create a Badge for the module (art work). You can use the ones inside Badgr but I don’t think they look as nice as ones you create in Canva. Just search for badge to get the square size, then edit any which come up. Download the Badge you created as a png file to your desktop so you can upload it into Badgr for use. I would make a Badge for each Module or unit of study.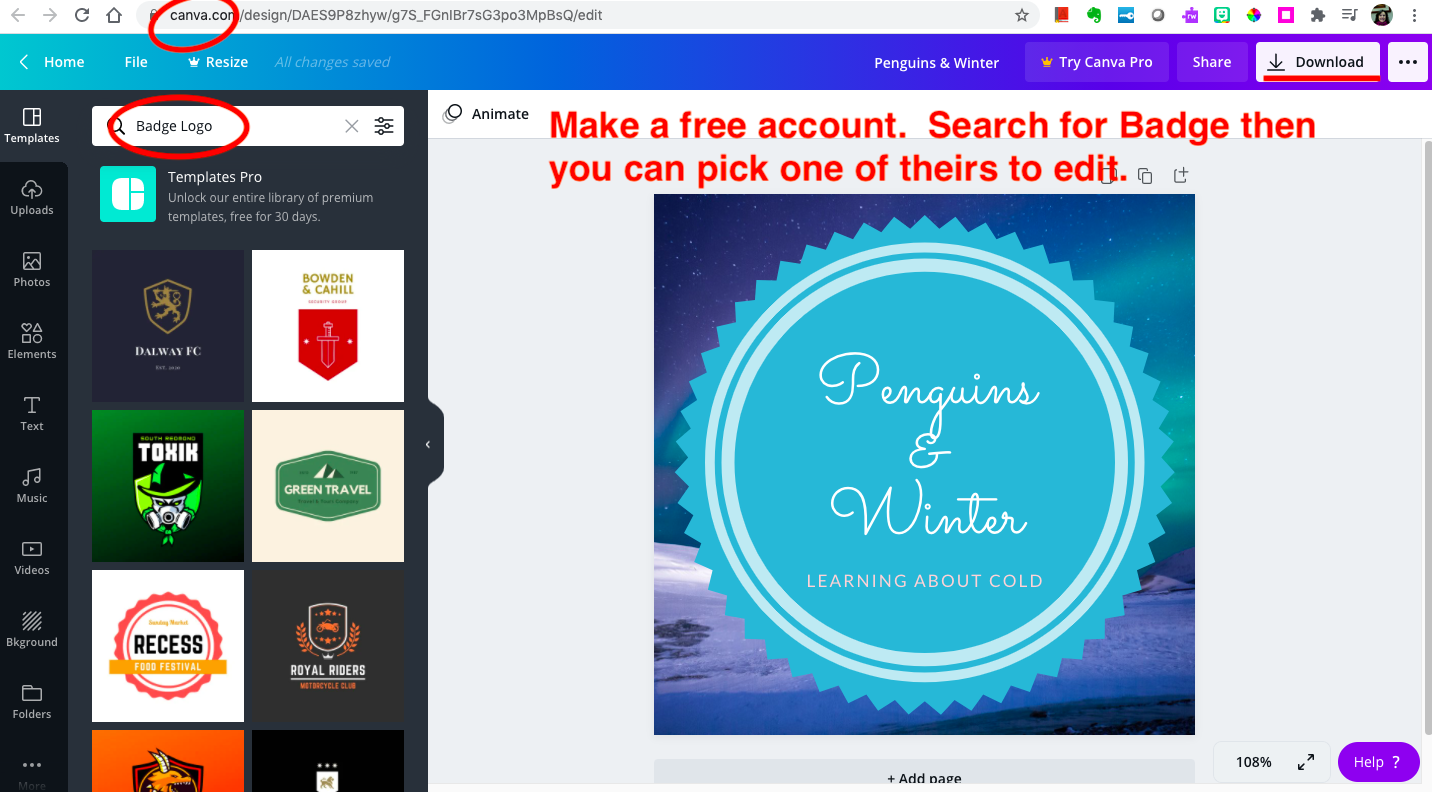
5. Back in Canvas, click on Badges in the left menu. It will show you all of your modules. You pick the badge you want to assign with the drop-down arrow. You can also create (or upload) a new badge from this drop-down.
6. Last step is that you must have the module set to requirements. This will allow the badge to be given upon completion of the module.
This video will show you the steps: https://www.youtube.com/watch?v=EyrJF9ugcdk